Tuesday, May 25, 2010

Backcountry Vegan Camp Meal: A Quinoa-nundrum on Grains

Ah, quinoa - the mother of grains - packed with nutrition & protein and very few calories.  However, I discovered that cooking black quinoa (which I selected for sheer novelty) - took way too long to cook on the trail.  My meals with quinoa included:
  • quinoa with granulated maple sugar, raspberries & blueberries for breakfast
  • quinoa with vegetable broth, onions, zucchini, carrots & peppers
The basic recipe is 1 c quinoa + 1.5 c water - 12 minutes for white and 15 minutes for black.  It didn't work - after 20 minutes, the quinoa was still quite hard.  Nothing attributable to elevation - sea level for both home and travel cooking attempts.

For my subseqent attempts to cook quinoa on the trail, I soaked the quinoa til it sprouted - and then put it in a pot with enough water, covered it and simmered - it took the better part of 40 minutes before I moved to someone's campfire. 

I cooked quinoa 3 times on the trail and each time was the same result.  I think I may try to dehydrate cooked quinoa to see if that works better on the trail.

Oatmeal is definitely going in my pack next time! 

Monday, May 24, 2010

Backcountry Vegan Camp Meal: Tempeh & Green Bean Stew

A quick trip to Trader Joe's can net some pretty healthy ingredients for a meal - I grabbed both tempeh and a tube of polenta (must have options) but when it came down to Friday night dinner on the tailgate of the truck, a single 2.5 qt pot and these delicious ingredients resulted in a very very tasty meal.

Ingredients:
  • 1 package tempeh, cubed
  • 1 bulb garlic, peeled and coarsely chopped
  • 1 can diced Fire Roasted Tomatoes with chiles (TJ's brand)
  • 1/2 package of thin green beans, rinsed, trimmed and snapped into 1" to 1.5" pieces
  • dried herbs or several sprigs chopped or snipped oregano, rosemary and whatever herbs you can grab from the garden or where you are camping (rosemary and bay are pretty widely available in Northern California)
  • olive oil
  • red wine (whatever variety you have at the camp site) or water
Instructions:
  1. Sautee the garlic til it starts to soften.
  2. Add the tempeh and cook until it browns.
  3. Add green beans, sautee til bright green - stir with wooden spoon
  4. Deglaze with a 1/4 c or so of red wine (to taste).
  5. Add chopped fresh herbs or dried herbs, pepper and salt to taste.
  6. Allow to return to simmer and reduce, then add can of tomatoes.
  7. Reduce heat, warm up to simmer and then serve!
Delicious and filling!

Friday, May 21, 2010

Backcountry Vegan Camp Meal - Sweet Potato Pancakes

Before I went on this trip, I strongly resisted the idea of traditional convenience breakfasts - like oatmeal - and was fantasizing about tasty & colorful brunchy delights.

I steamed sliced & peeled sweet potato, pressed it through the ricer and dehydrated the sweet potatoes.  The dried cooked sweet potato seemed to pull a lot of moisture from the air, so I re-dehydrated and then powdered the sweet potato in my Breville blender.

My idea was to use the powdered dried sweet potato to make a thick paste, sautee it on both sides to make it brown - and have little latkes.  I had some granulated maple sugar to sprinkle on top of it - sounds perfectly delicious, right?

Since I did not test this recipe out before going on the trail, it could stand a little refining.  I used too much water and my patties did not brown as well as I had hoped and were a little squishier - but still quite delicious.

Next time - using less water or perhaps shredded dried sweet potatoes (instead of steam blanched/dried/powdered) - I will try sprinkling the maple sugar on the patties before flipping them to help along the browning/caramelization process.  I'm also considering shredding/grating raw sweet potatoes, dehydrating and then frying them up rehydrated - they should cook up pretty well so it may well be time to test that recipe before my next trip!

Thursday, May 20, 2010

Backcountry Vegan Camp Meal - Vegetable Udon Noodle Soup

There can honestly be no backcountry camping meal that is easier to make - one pot is all you need, and a little restraint else you risk exceeding the capacity of your pot!

Less recipe and more about process - especially carrying a variety of ingredients that can be used in multiple dishes. 

Ingredients:
  • vegetable boullion
  • dehydrated vegetables
  • dried wakame and/or hijiki
  • udon noodles
  • optional: kuro goma (spiced toasted black sesame seeds that add a little flavor and crunch to any soup)
  • optional: chili flakes
Instructions:
  1. Soak about 1/2 to 3/4 c dried veggies such as carrots, zucchini, peppers, onions and shitake mushrooms (I like to carry these whole and break them up before I dehydrate them) in your wide mouth Nalgene bottle - I like to do this as I am leaving my breakfast or lunch stop so they are soaked for my next meal!
  2. Simmer 2 c water in a pot to dissolve your bouillion.  Bring pot to a boil.
  3. Add udon noodles - you may need to break them in half or manage them manually til the noodles soften enough to fit in your pan.   
  4. Bring water to a boil, add veggies & soaking water.
  5. Bring water to a simmer, check veggies & udon noodles for tenderness.  Remove from fire.
  6. Add wakame, stir til softened.
  7. Enjoy with gusto & share with your campmates! 

Dried seaweed is the key to the savory flavor this soup carries - and dried wakame or hijiki weighs less than nothing!

Don't forget - unless you brought a small mesh strainer or use a bandana to strain the soaked wakame, it's already salty so do NOT add more salt to your soup until you have tasted it.  In addition to providing sodium, most dried seaweeds also provide Omega-3 fatty acids, magnesium and calcium -- all good nutrients to replace after exerting yourself on the trail!

Wednesday, May 19, 2010

Backcountry Vegan Camp Meal - Mushroom & Veggie Gravy & Mashed Potatoes

Mashed potatoes with rich mushroom gravy is one of my favorite comfort meals at home - taking it on the trail is really a no brainer.  While instant potato flakes don't taste nearly as good as freshly steamed and riced Yukon gold potatoes - they weigh next to nothing, are very quick to prepare and very satisfying when covered with a rich sauce made by soaking some dried mushrooms (which also weigh next to nothing!) and the nutritional value is improved with the addition of other dried veggies in your pack.

This is less a recipe, per se, than process as ingredients will vary with your preference & preparation!

Ingredients:
  • potato flakes (I buy these in bulk at Rainbow Grocery)
  • dehydrated zucchini, porcini, cherry tomatoes, carrots & onions
  • dried herbs to taste - thyme, rosemary, etc
  • brown gravy or mushroom gravy - store bought packet is ok, or you can bring corn or potato starch
  • fresh garlic made it into your pack? fresh herbs along the trail? 
Instructions:
  1. Put about 1/2 cup of dried vegetables into a widemouth plastic quart bottle with 2 cups of water at least an hour before you get to your final destination for your meal.
  2. Once you arrive at your destination, boil water and prepare the mashed potatoes, set aside.  Make sure that you don't make TOO many mashers if you are eating solo, you can just pour the gravy right into the same pan they were mixed.
  3. If you have any fresh veggies - sautee those first and leave in the pan.
  4. Strain the water from the pre-soaked veggies into the pan to heat up along with any dried herbs.
  5. Bring to a simmer, whisk in the prepared gravy packet or starch with a fork to get the lumps out.
  6. Add veggies and cook low til gravy thickens up.  Pour veggie gravy over top of mashed potatoes and eat with great relish and satisfaction, knowing that your other meals will be just as delicious and easy. 
Buen provecho!

Tuesday, May 18, 2010

Backcountry Vegan: 5 Truths About Eating on the Trail

  1. No matter how good the  intentions, complicated recipes or advanced prep mean carrying around ingredients that the traveler may not feel like using because of time, light, energy, fuel or space restrictions. Good planning results in not just good nutrition but also satisfaction and a light or nonexistent store of provisions upon the return home.
  2. Regardless of how enticing a recipe for chocolate cherry almond bark sounds - chocolate always melts if traveling anywhere warm.  Is it worth it?  Life is too short to eat broken chocolate - bring calorie rich treats that are appropriate to the environmental conditions of the trip.
  3. Making homemade trail mix and granola always sounds like a good idea - but buying it is so convenient and such a good excuse to investigate local organic groceries along the way to the start of the trail or on the rod.
  4. Despite best intentions - who doesn't end up picking up packaged snacks & treats to take along? It just happens - whether it's Lara bars, Nutter Butters, Primal seitan strips, or Sharkies - there are certain convenience foods that are easier bought than made.
  5. Camping often means meeting people & sharing meals or using locally available or foraged ingredients -- provisions should allow for flexibility and scalability (up/down).

Monday, May 17, 2010

Evergreen Rd Morels!

Last week, a last minute invitation was extended to head to the Sierras and go find some morels.  I hopped in my friend's Zipcar, along with another of her friends and we went up to the Stanislaus National Forest to see what the MSSF folks left behind after their 2010 morel foray.

From the moment we got to our camp - we hit the jackpot.  Keith spotted something growing next to the fire pit and plucked up a somewhat darking black morel and ran off to show it to Kathryn before I caught a proper glimpse.  Looking down - I noticed a second morel growing right there!  Two morels right at the fire ring?  Incredible!


A walk around our camp to the other fire rings proved futile as the other fire rings were all in to frequent or recent use, but on the way back to our somewhat remote site - I found several morels growing right on the side of the driveway in the campground!  Walking around in the woods on the residential property of Peachgrowers Grove, I found several gorgeous puffballs as well.

As soon as we put up our gear, we headed off to stomp the woods before sunset - between the three of us, we found at least a couple pounds of morels.  Mostly small morels -  remember - they are the same color as the dirt:


I found a pretty healthy tree frog - and Keith uncovered a gorgeous salamander:


The next morning, we were up and stomping around the woods again - every time we thought we'd notice a pattern, we'd find mushrooms in another kind of spot.  Sometimes they were on the west face of a slope or pile of woodchips that had some fire damage and disturbed earth, sometimes they were just growing in the pine needles next to some trees - and lots of times they were growing right on the side of the paved road!  Here are some photos of morels in their natural spots and of our haul - we all got an average of 3lbs each:

The result of 3 the tramping in the woods of 3 people!

Where should you go look for morels?  They like pine trees and disturbed soil; any place that you find burn areas - whether a wild fire or a customary spot for burning brush & plant debris for fire management.  Some current reports are that the morels are happening but moving north and to higher elevations pretty quickly.  I have heard one report of a friend near Bear Valley who has pulled over 120 lbs already!  

Last August's burn in Yuba County interests me - I want to check on the elevations of those burned areas for a target in early June.  Failing that - Mt Shasta & Lassen may be good candidates for the second week of June.  Are you with me?

Sunday, May 16, 2010

Backcountry Vegan - Tools & Gear

You do not need to have a commercial kitchen - but it does help to at the least have a good knife and a good dehydrator.

Prep tools:
  • Kansui Dojo Chef's knife - I swear by this knife! It's quite affordable and it holds an excellent edge for a long time - it's a great all purpose vegetable/fruit knife.  Go get one!
  • Breville 800BLXL Blender - this blender has been one of my favorite acquisitions.  I see all kinds of love lavished on the Vitamix - but so far, this blender has met all my needs.
  • Cuisinart 9 cup Food Processor - bought used on E-bay, it has character but may need to be replaced in a few years.
  • Williams-Sonoma Professional Multi-chopper - my friend Matt first introduced me to this gadget - then he got me one for my birthday last year.  It has been very helpful at cutting up large quantities of fruit or veg in uniform pieces - great for tagines and for dehydrating.
  • Excalibur 9 Tray Food Dehydrator - after building a monster of a solar dehydrator - I finally threw in the towel and got the Excalibur.  I haven't looked back - it works like a dream and doesn't consume much power.  The solar dehydrator is good for storing persimmons to ripen and for drying off chanterelles after I clean them.
I cannot overstress indispensability of a good dehydrator!  This will make all the difference in your prep for trail food - you'll find yourself buying entire flats of strawberries and graciously accepting over-the-fence donations of leggy zucchini from your neighbors.  It costs much less to dehydrate your own veggies than to purchase packets of dried or "freeze dried" anything.

Cookset for the Trail
Although I didn't have a problem carrying the Pocket Rocket on most flights, one TSA employee decided to make a case of it - emptying my ENTIRE backpack and threatening to confiscate the stove which is clearly permitted based on TSA's own guidelines (he sounded really disappointed when his manager told him on the phone that it was permitted).

I'm curious to experiment with alcohol burning stoves made with pepsi cans - they weigh a lot less than carrying MSR fuel and it's pretty easy to make one in case it gets confiscated in travel, and it burns a lot hotter/cheaper fuel.

Of all the gear I brought on the trail - the most dearly missed was a larger wooden spoon or spatula, even some bamboo tongs would have been nice.  I didn't use the knife very much - possibly could have skipped that acquisition.

Saturday, May 15, 2010

Backcountry Vegan - Menu Planning, Food Prep & Packing

Prep vs Packet:
For my first backpacking trip to Kauai, I had a hiking partner - and the two of us decided that for efficiency's sake, we wanted to use some prepared camp meals. I ordered a dozen or so vegan meals in biodegradable/burnable packets from Mary Jane's Outpost - but we got rained out so the meal packets returned home with me. Last summer, I decided to use up the meals on my 2 week long trip to Portland & back. Unlike the usual car camping trips, I wanted to bring stuff that would be relatively easy to put together.

Mary Jane's Outpost has some good options - and lots of vegan stuff. The packets I brought along included: brownies, griddle cakes, ginger sesame pasta, corn ad,  corn salsa, falafel, and lebanese peanut bulghar. The main problem with some of her offerings is that they contain dairy and beans - two foods to which I am allergic. The brownies were the one item that most impressed me but the rehydrated pasta didn't have the right mouth-feel. For the most part, none of these items were all that difficult for me to put together on my own.  Falafel mixes can be had anywhere (and I can't eat a lot of that anyway due to the garbanzo flour). Couscous and mushrooms? Just why bother with all the packets?

For this trip, I decided to focus on using fresh, seasonal ingredients that I could dehydrate and which would be satisfying when rehydrated. The most helpful cookbook was the one that talked the most about the processes involved in dehydrating food and how to use it. My food supplies and meals had to conform to these principals:
  • Whole foods - similar to how I cook at home.  I wanted to avoid pre-packaged processed foods with long lists of ingredients entirely.  I don't eat like that at home - and don't want to eat like that on the trail.
  • Prep & pack foods that dehydrate well and weigh little, avoid bringing too many liquid condiments (dressings, vinegar, etc).
  • Avoid over-relying on processed starches like pasta, couscous and bread.  Couscous and pasta are filling and a great source of carbs - but vegetables are key to other nutrients and allow the body to build protein needed by active people! Quinoa was to be my main carb/protein base food, along with whole wheat udon noodles and rice noodles.
  • Avoid foods that take too long to cook and thus require more fuel, like rice.
  • Flavor foods generously with dried herbs & spices.
  • Include foods that replace salts/magnesium lost to sweat while hiking and exercising outdoors - dried seaweeds are great for this purpose.
  • Foods should be packaged so they can be used in multiple recipes - dried zucchini, carrots, mushrooms & onions all work pretty well in many different recipes.  My magic number was 3 - I would just come up with ideas for different dishes and food combinations for each food, but did not establish this as a hard and fast requirement.
Building in Flexibility:
Most backcountry cookbooks don't take into consideration scalability and the incorporation of locally sourced or volunteered ingredients. In any kind of camping situation - well, let's face it - humans are social animals.  We like to congregate in the dark over fire and share food together.

No matter where you go, someone's going to suggest sharing food or even a camping potluck. It's not just a matter of throwing all your extra food in a pot and hoping it comes out right (even if folks say it does, doesn't make it true).

And you might find some amazing local contribution like key limes or Mexican oregano or a mango.  Flexibility and creativity are essential to fun and delicious backcountry cooking.

I had some ideas for favorite camping meals and new stuff that might be fun to try - and the book I liked most gave me a few ideas for experimentation. I would probably have tested a few things out before going on the trail, but there were no disasters and I ended up making some pretty awesome food, and was able to share with folks several times with ingredients that weren't terribly expensive but which provided excellent results.

Supply List:
In no particular order - here is a list of the food that I prepared and brought with me - in the backpack - as the bases for meals on the trail.

Fruits & vegetables:  hey, I'm a vegetarian! this makes up the bulk of my diet at home, so why not on the trail? I don't eat out of packages at home - so why eat packaged food on the trail?
  • Persimmons - 1lb home dehydrated slices
  • Apples - 1/2 lb home dehydrated/cored slices
  • Strawberries - thinly sliced & home dehydrated (2 pints fresh)
  • Apples - sliced & home dehydrated (what I had left from last fall - about 4 cups dried but lotso air!)
  • Blueberries - home dehydrated whole (1/2 pint fresh)
  • Raspberries - home dehydrated whole (1/2 pint fresh)
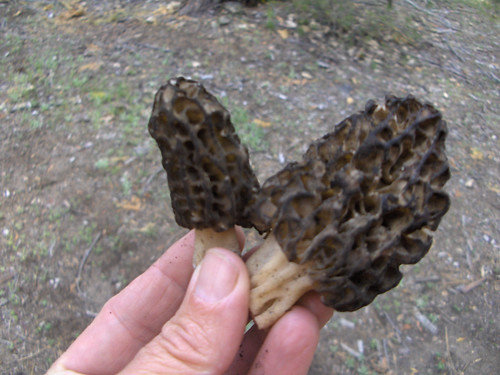
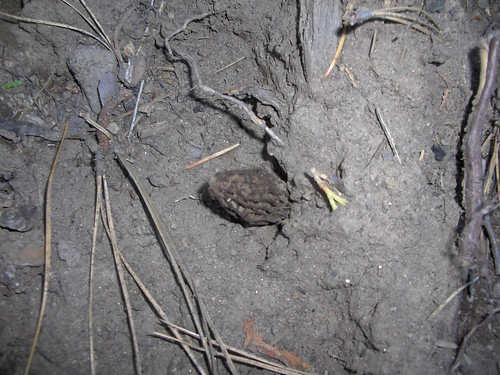
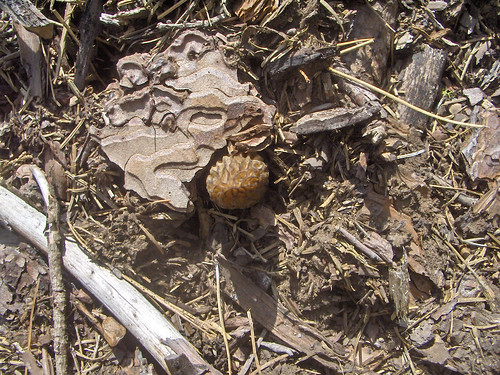
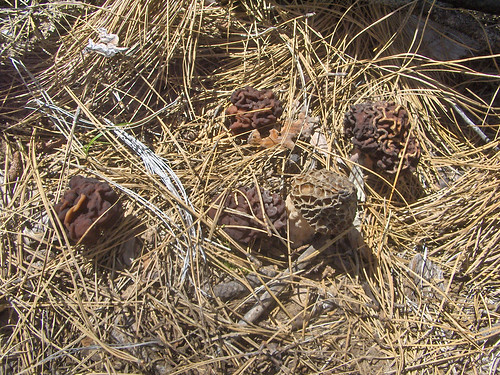
  • Mushrooms - dried porcini & shitake mushrooms from Mountain Rose Herbs - dried mushrooms are indispensable!
  • Onion - 1 red, 1/4" dice
  • Onion - 1 yellow, 1/4" dice - both kinds of onions turned out very well rehydrated and in all dishes.
  • Carrots - 4 large, 1/4" dice - the carrots got so very tiny! I may just try slices or bigger chunks.  They worked out great.
  • Zucchini - 4-5 courgettes, 1/4" dice -they looked like shrinky dinks and got way smaller than I expected! These could be added soup, gravy, sauteed with other vegetables. They rehydrated really nicely and were very delicious.
  • Sweet potatoes - 3 bigger than a handful each.  These were sliced, steamed and mashed in the ricer before being dehydrated.  Sweet potatoes reabsorb moisture from the air pretty quickly, so I had to run them through the dehydrator a second time and then powdered the mashed dried sweet potato in my Breville blender.  I got a very fine powder which imagined would be used in at least three preparations:
    • blending into regular flaked potatoes for mashed potatoes
    • rehydrated thickly and sauteed as sweet potato pancakes/latkes
    • mixed in with peanut butter and veggies for a soup
  • Red bell pepper - 2 large, 1/4" dice & dehydrated (also super shrinky dink!) Bell peppers rehydrate nicely and add great flavor to anything. 

Prepared foods: can't get away entirely without  without using some prepared foods!
  • Potato flakes - about two cups store-bought instant organic potato flakes.  Let's face it - mashed potatoes are very satisfying - as mashed potatoes, soup or as soup thickener.  Who needs an excuse here?
  • Vegan vegetable bouillion cubes - 2 packages of 8 cubes
  • Seaweed: 1 package of wakame - provides sodium, magnesium & calcium
  • Roasted black sesame seeds
  • Udon noodles
  • Rice stick noodles
  • Quinoa, black (2 cups dried)
  • Maple sugar, granulated (1/2 cup)
  • Tofu - home dehydrated 8 oz 1/2" cubed tofu.  It did not rehydrate - not even after soaking for a billion years and being simmered in soup.  It was hard and inedible.  Time for more dried tofu experimentation.
  • Lara bars & Bumble bars - 6-8 bars for eating on the plane or in transit or as emergency backup.
  • Mixed raw cashews & almonds.
Packing & Storage:
One of the things that I didn't like about all the backcountry cookbooks I read was that they called for a lot of plastic bags.  A lot. Like - pre-measuring out and mixing a ton of things and keeping them separated in a lot of little bags.  Or bringing lots of little plastic condiment packets - or worse - small bottles with tons of liquid condiments. 

Instead, I wanted to just put like ingredients into larger bags - using mostly wax paper bags (compostable or burnable), which I rolled up, secured with rubber bands and put into 3 larger ziploc bags.  I like to use a variety of seasonings and despite any potential weight issue, I don't think I would travel without at least one spice wheel in my pack. 


Pre-Trail Shopping
Depending on how you travel, you may need to pick up a few items! Since I was flying to Kauai, I had to build a list of a few items that I couldn't bring in my carry-on:
  • olive oil
  • a small knife (which I didn't really need that much)
  • coffee (I figured I should just buy local coffee since I would be in Hawaii)
  • stove fuel
  • 1 pint each of Frangelico & rum - transferred to 16 oz water bottles.  Hey, I was on vacation and a girl's got to be able to doctor her morning decaf coffee once in a while!

Monday, May 10, 2010

Backcountry Vegan - Backcountry & Camping Cookbook Reading List

My pre-trip reading list included these books, in no particular order:

Reviews coming soon!

Refurbishing Furniture... Green or Not?


Living room


It seems like I am spending a lot of time fixing up my furniture instead of buying new furniture.  Due to problems with mold & mildew - I have to sand and fix up the back of my antique mahogany armoire.  I'm regularly re-doing the 6' high kitty condo with new hemp rope & indoor outdoor carpet.


Equanimity (HPIM6127)


Sun damage on the arm in 2005 or so - within the next year, the seat cushion between 

the black pillow and the kitty started to shred parallel to the length of the sofa.

Enter - the problem of the sofa.  I bought it in 1998 or 1999 at Z Gallerie on Union St in SF.  I loved this sofa to bits.  It started showing sun damage on the fabric around 5 years of age, and by 8 or 9, the fabric on the seat was starting to fall apart and I kept it covered with a throw for well over a year before I realized that it needed to be recovered.  

Of course I already thought of recovering it myself OR making a slipcover.  Recovering the sofa would mean taking a class - which wasn't available. Being a single arm sofa would make it easier but there are all sorts of things that I just didn't know about - like how do you get the trim that is tacked around the whole sofa?  How do you pleat the arm? What do you use to do all this? I know using my little heavy duty stapler would NOT be the answer - if it couldn't hold fabric and hemp rope onto a kitty condo for the long term, what good are 3/4" staples going to be on a sofa?

Making a slipcover - for a single arm sofa? Come on!  How ridiculous would that even look?  At a certain point - I realized that if I tried recovering it myself or making a slipcover - it would look like pure shit.  Some things are better left to the professionals.  However, I thought I would save money by looking for eco-friendly fabrics.

Bamboo is freaking expensive and is not available in upholstery weights when I looked.

After months of trying gave up on trying to find eco-friendly/sustainable/organic type of upholstery fabric, I gave up.  From what I have read online, it seems like those fabrics are not not available to consumer and what's available to trade is more than $50/yard.  At Britex, I bought a polyester ultrasuede for $19/yard to cover my sofa.  Getting someone to do the recovering seems to be ridiculously expensive - it's a one-arm chaise and I was getting prices anywhere from $500 to $800.  The damned thing cost $750 new!


I finally settled on a guy from craigslist who is charging $525 to recover my sofa - fabric cost over $100.  It would be just as "cheap" to replace. Why does it cost so much to do the right thing?  Is recovering the sofa the "right" thing?  I have had it for over 10 years, afterall.


Sofa for Sale - $400

The finished result - note how the trim at the lower right/front leg is drooping - I had to tack it up with a stapler.


As it turns out - I was right.  The Craigslist guy had tools that I didn't have or even imagine..  The stapler he used had very very long staples that were narrow and thin.  While he did the work on the chaise in my own backyard, he made all the trim in the shop.  In the end, the guy didn't do such a great job. 
 
Though he still did better than I, the front of the single arm on the chaise didn't look right at all and there were plenty of bumps and such. I totally fell out of love with it in its new color (went from a red brocade which fell apart from sun damage & use after 7 years and which I draped for another 3) to a light grey-green.

I ended up selling it to a friend who admired it very much and almost covered the costs of fabric and recovering it.

Saturday, May 08, 2010

Potato Condo Harvest!

The Great Potato Condo Experiment - after growing potatoes for nearly a year, I wasn't quite sure when I should just knock it over and harvest.  I do, afterall, live in a 365 day growing season (for potatoes, apparently) so none of the plants up and died or dried out on me as I expected as the signal that it was time.  Over the past couple of months, I would find a few potatoes popping out of the wire mesh here and there - I even cut down the wire mesh by 2' because the soil compacted and slid out so much.

Finally, with James' assistance - it was time to harvest.  As he said - $40 worth of dirt for $10 worth of potatoes.  I saved the plants and some of the potatoes with sprouts and put it all into 3-gal nursery pots in a different area to continue growing potatoes - here are photos of the condo harvest.


Thursday, May 06, 2010

Backcountry Vegan!

I've just returned from Maui & Kauai - I went backpacking on the Kalalau Trail.  After reading through a huge pile of backcountry & backpacking cookbooks - I came to the dismal realization that most of them really don't meet my needs or my style of cooking (or sharing!).  I am going to be refining my thoughts on backcountry cooking - focusing on using whole ingredients, prepping with a dehydrator, and cooking quantities based on need (little or very hungry, how many people are sharing?) and available ingredients and other resources.  It seems more of a process than a recipe.  I don't like the idea of schlepping a ton of plastic bags out to the wilderness, "cooking" in plastic bags or hoarding condiment packets.

In the next couple of weeks, I will put together a list of the food that I prepared in advance, what I bought locally, descriptions of some of the meals and what worked.  I'll also be discussing some other ideas I have for vegan, whole foods cooking - that is more like the way you cook at home.  None of this "spread peanut butter on a flour tortilla, roll up, eat" as a recipe -- I'll also write up reviews of the backcountry cookbooks that I read and point you to the single book out of more than half a dozen that I think is worth buying.  So - stay tuned!