One thing that I have most missed in my vegan diet is caramel - I have always loved caramel and caramel & chocolate is truly an awesome treat. After looking over many many recipes for vegan caramels - many from a Daring Bakers challenge - I realized - it's a lot of guess work. Despite the fact that the top of my candy thermometer (no, not granddad's candy thermometer, mom!) busted off after arriving at the cabin this weekend - it still worked well enough for me to use in my first experiment with vegan caramels.
A major discrepancy was in the amount of invert syrup/agave to sugar, and the temperatures required. The bottom line is this - for soft caramels, you really want somewhere between soft and firm ball - you don't want more because you'll end up with something that will pull out fillings and crowns.
Here's my recipe - your mileage may vary, you should definitely experiment!
2 cups sucanat
1 cup Golden Syrup
1/4 cup maple syrup
Mix together well, and while it is working up to 275 degrees, mix together:
1 cup coconut milk (from a can - shake well!)
1 cup cashew cream (I used Mimic Creme this time)
1 chipotle pepper, toasted and ground in the spice mill
1 vanilla bean (slit the pod, scrape into pan, add pod)
Let the cream mixture warm up - ok if it simmers a bit, just add more coconut or cashew cream.
Keep a brush and water handy - when you stir the sugars, keep in mind, this reduces the temperature so don't stir too often. Use the brush dipped in water to wash down the sides of the pan after you stir. Once it gets to 275, pull it off the burner and add 2 Tb of coconut butter.
Next, add in the cream mixture while stirring - take out the pod piece - and then let it heat up to about 245.
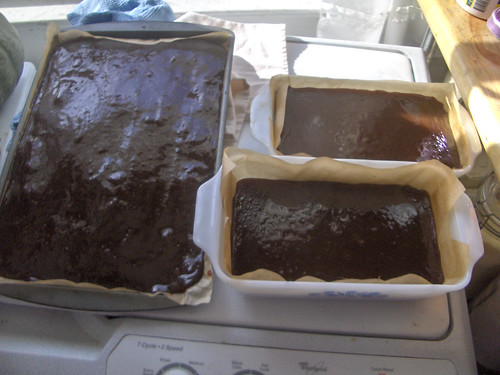
Pour it into a pan lined with parchment paper - moisten with coconut butter if you want to feel safe - and let cool. If it's 40 degrees outside, by all means, set it out on the porch like I did (just pray the racoons and bears aren't around looking for dessert).
This came out super killer yum. Once I dip it in chocolate, I'll try to remember to take some pictures. I promise.
Showing posts with label candy. Show all posts
Showing posts with label candy. Show all posts
Saturday, December 26, 2009
Wednesday, November 04, 2009
Persimmon Paste
A review of my freezer tells me two things - first, I still have frozen persimmon puree from last year. Second, roasted tomato sauce, persimmon puree and carrot soup all look fairly similar in the freezer and should be labeled appropriately.
After rave reviews of my quince paste (dulce de membrillo) it occurred to me - why not do this with some other fruits? Like, for example, persimmon?
I measured out equal quantities of persimmon & sugar, mixed and heated it. Concerned that it would not set as well as the dulce de membrillo (remember - quinces have more pectin in them than other fruit), I added some pectin (based on volume) and cinnnamon to the persimmon paste.
Let me tell you - this stuff sticks to the pan at higher temperatures a lot more readily than any jam or quince paste has! You have to keep the heat low and stir often - once it reduces, then put it into low dishes or cookie sheets lined with canola oil rubbed parchment paper and put into the dehydrator. The persimmon paste set a lot more quickly than the quince paste (likely the pectin) and according to one friend, "it tastes like Thanksgiving!"
Tuesday, June 10, 2008
Chocolate Peanut Butter Cups
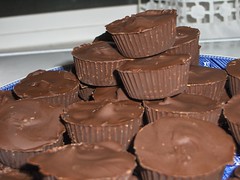
VEGAN DARK CHOCOLATE PEANUT BUTTER CUPS
Before you begin, you'll need
- mini-cup candy mold, mini-muffin mold (optional for "Quick & Dirty")
- candy thermometer (optional for "Quick & Dirty")
- double boiler
- kitchen scale
- small pastry brush or (new) paintbrush
- rubber spatula, measuring cups, bowls
- parchment paper
For the filling:
1/3 cup graham cracker crumbs
3/4 cup powdered sugar
3/4 cup natural crunchy peanut butter (no added sugar)
Optional:
1-2 Tb coarsely ground pink Hawaiian sea salt (big crystals for effect)
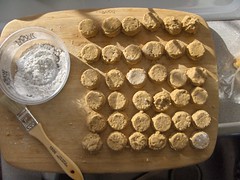
- Make your centers by sifting the powdered suger through a wire mesh sieve or flour sifter to break up all the lumps.
- Blend the filling ingredients in a bowl using a stand or hand mixer, until it resembles cookie dough. Depending on your ingredients, you may want to add more or less peanut butter or powdered sugar. Feel the filling with your fingertips - does it hold together enough (too sticky or too crumbly are not good).
- Optional: Add your coarse pink sea salt - this adds a great burst of flavor that goes really well with peanut butter and chocolate.
- Make all your centers before you melt your chocolate. Measure out about 1TB for each center - find a spoon or gadget that works. A melon baller makes just about the right size and a shape that fits into the cups perfectly. If you don't have a mold or mini-muffin tin, roll out the centers into balls -- leave them round or press them into patties.
1 pound chocolate couverture
NOTE: I recommend Sweet Earth Organic Chocolates for vegan, soy-free dark chocolate
Melting chocolate doesn't have to be complicated or intimidating. It's true that if you don't temper chocolate correctly, you'll have light gray-ish streaks and it wouldn't be fit to serve on a plate at a fancy restaurant. Let's face it -- you're going to eat it anyway.
TIP: The important thing is not to add water to chocolate (that ruins it) and don't over cook it.
- Set up a bowl of ice water that will hold your double boiler or heatproof bowl. This is where you'll cool down the chocolate to stop it from cooking while you are working with it.
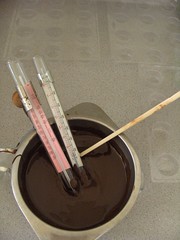
- Put a cup of water in your pan and start it to boil.
- Put about 12 oz of your chocolate in your double boiler or heat proof bowl over the boiling water. Let it melt and keep an eye on the temperature - you don't want it to get over 118 degrees.
- Once the chocolate has melted, take it off the heat and add the remaining 4 oz of chocolate. Stir gently until it melts and then put it over the cold water bath.
- Once the chocolate has cooled to 90 degrees or so, dip your centers and lay on waxed paper OR use your brush to cover the sides of your muffin tin.
- Don't use too much chocolate or it will just drip down and become uneven. If it drips down into the bottom right away, your chocolate is still too warm. Once the sides of your mold are covered in chocolate, coat the bottoms.
- Chill the mold a bit in the freezer or refrigerator - check for areas you may have missed and give another coat of chocolate. Chill again to set if necessary but don't chill to the point where the chocolate is cold and will crack.
- Add your centers to the mold, press gently -- you don't want to crack the chocolate.
- Once all the centers are placed, brush the tops with chocolate - sometimes you can dribble it off the spoon back. You may need to rewarm the chocolate a bit if it has cooled too much. You might even be able to top each one with a goji berry or two...
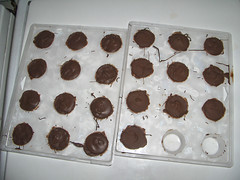
- Cool the chocolates -- in the refrigerator or freezer. Once they are set, turn them out onto a clean dish towel. These will keep for weeks in the refrigerator or longer in the freezer.
Subscribe to:
Posts (Atom)