Showing posts with label dessert. Show all posts

Sunday, December 12, 2010

Candy Cap Blondies

Last month, after signing up for the culinary interest group for the Mycological Society of San Francisco, I found myself volunteering to help make desserts for the annual holiday dinner. The organizer and her other volunteer both live within a few blocks of me, so meetings were convened and e-mails flew back and forth.  In the end, I brought a pile of delicious vegan desserts including: Mexican Chocolate Torte, Persimmon Bread Pudding with a Bourbon Anglaise sauce and  Candy Cap Blondies using a recipe created by Eric Tucker for one of his classes at Millennium Restaurant (recipe below). 

The dinner came off pretty smoothly - my friend Scott joined me and even loaned a hand (& tools) to help set up the xmas tree and set tables.  There was so much food!  We could have easily had more people there - and the East Bay location at the Albany Community Center had a fantastic kitchen and huge dining room.  The chanterelle-quinoa stuffed portobello mushroom was really delicious, as were the mashed potatoes with *vegan* mushroom gravy and a delicious mushroom soup with loads of delicious mushrooms.  My desserts partner made up about 20 different kinds of chocolate truffles, mini eclairs and cream puffs.  Needless to say - I was very well fed and brought home much of my dinner for lunch the next day. 

I am still eating some leftover desserts this week, as well - I hope you'll pop in for coffee and cake!

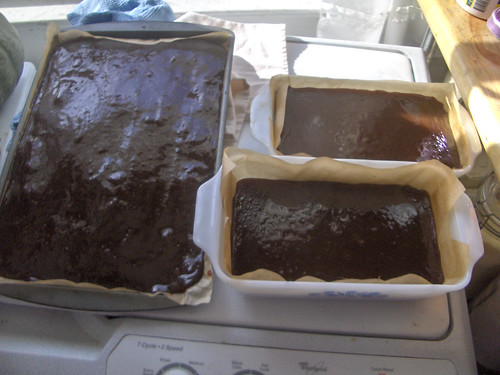
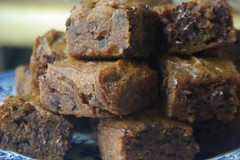
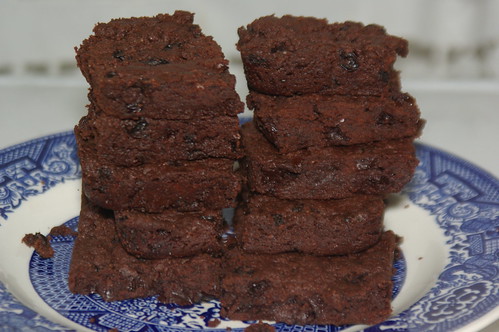
Eric's Millennium Candy Cap Blondies

INGREDIENTS:
  • 1/4 c cocoa butter
  • 1/3 c grapeseed oil
  • 2 T ground dry candy cap mushrooms
  • 1/4 c rice or almond milk
  • 1 t vanilla extract
  • 1 c brown sugar
  • 1 1/2 c all purpose flour
  • 1 1/4 t baking powder
  • 1 t Ener-G egg replacer
  • 1/4 t salt
  • 1/2 t ground cinnamon
  • 1/4 t ground nutmeg
  • 1/4 t ground allspice
  • 1/4 t ground clove
  • 1/2 c pecans, lightly toasted and roughly chopped
  • 1/2 c chocolate chips
DIRECTIONS
  1. Place the first 5 ingredients into a double boiler and melt.  Remove from heat and let steep for 20 minutes or so, then remove double boiler from hot water and let it cool.
  2. Sift dry ingredients together - except for pecans and chocolate chips.
  3. Add wet ingredients - at room temperature, not warmer - to dry ingredients.  When mixed, add pecans & chocolate chips.
  4. Turn into lightly oiled pan lined with parchment paper, bake 22-24 minutes at 350.  This will fit in a large loaf pan or a 9 x 9 pan if you like thinner blondies (which will need to be removed sooner than a deeper pan).  Keep an eye on this - if you increase the recipe size, it will take longer.  If you use a dark metal pan that holds more heat, they will cook faster and you will end up with cookie instead of blondie.  You want to see the blondies puff up and get tall, filling the sides of the pan and becoming golden brown on top.  A 3x batch fits a 13 x 9 pan and takes well over 40 minutes to achieve doneness!

Friday, December 03, 2010

Persimmons are BACK! - Persimmon Bread Pudding for BREAKFAST!

If you're like me - an avid forager & kitchen witch - you might wake up one morning to discover that 40 of the 212 persimmons you harvested and have spread out on cookie sheets, trays and the little cardboard trays that once held pint and half pint canning jars - are ripe and already have been discovered by the ants.  Fortunately, the ants never get farther than under the little crown of four leaves at the stem and are easily evicted under running water.

After filling six dehydrator sheets with sliced persimmon, and putting 11 cups of persimmon pulp into freezer bags - you then discover that the gallon bag of croutons and the decidedly non-vegan chicken parts rescued from the freezer of a friend moving to Portland (to pass along to another friend for chicken stock - hey, the chicken is already dead!) - are taking up so much space that you don't have much room for more persimmon pulp in the freezer.

Then, the next morning - say, today - you wake up and find that only 3-4 persimmons, small ones at that, are really super ripe and it's not worth adding them to the dehydrator when you can kill two birds with one stone by using up some of those fabulous sourdough croutons.

Ladies & Gems - I give you:


Persimmon Bread Pudding


INGREDIENTS:
  • 4 cups bread cut into 1"-1.5" chunks (last night's leftover baguette baseball bat is ok!)
  • 3 cups almond milk (regular or vanilla)
  • 2-3 small Hachiya persimmons so ripe that you have to take care not to pierce the skin with your fingertip
  • 1/3-1/2 cup maple syrup
  • 1 Tb ground cinnamon
  • 1/2 tsp ground clove
  • 1 tsp vanilla extract
  • 1 cup raisins or currants or dried cranberries (or some other dried fruit - chopped dried apricots, nectarines or apples might be nice!)
  • 3/4 coarsely chopped pecans
DIRECTIONS:
  1. Pour almond milk into your blender up to the 2 cup mark.
  2. Cut hachiyas in half and scoop out pulp with a big tablespoon, straight into the blender.
  3. Check the level - add more almond milk to bring it up to 3 or 3.5 cups.
  4. Add maple syrup (reserving 3 TB), cinnamon, clove, vanilla to the blender cup - put the lid on and process til smooth.
  5. Pour custard onto bread crumbs in a large mixing bowl - let soak 5-10 minutes, depending on how tough your bread is already.  You want it to absorb a lot of the liquid and there will still be some liquid floating around.
  6. Mix in raisins and toasted nuts gently - don't mash up the bread!
  7. Transfer to a lightly greased gratin dish or baking dish - the depth of the dish affects the cooking time and the final outcome.  If you like a soft, custardy bread pudding, use a deeper dish - if you like it to be a little more chewy and crispy, use a more shallow dish.
  8. Drizzle reserved maple syrup on top.
  9. Bake in 375 oven for 20 minutes - the bread pudding will bubble and get puffy - it will settle a bit after it cools.
Eat it warm or cold!

Wednesday, September 15, 2010

Vegan Pizzelle Cookies!

I loved making pizzelle cookies as a kid with my sister & brother - we always had fun mixing up the batter with different extracts like anise, almond, orange or lemon - and dusting the hell out of the cookies with powdered sugar.  We always broke off the edges of the overly large cookies and ate all our mistakes.

As a vegan, it's often challenging to modify some recipes - most pizzelle cookie recipes use equal amounts of fat and sugar, and an amount of flour that is equal to both.  However - no liquid - so it's the melted butter and egg that provide the moisture, making for a very sticky, thick batter.

The other trick is in getting to know your waffle iron - you know the kind with waffle grids on one side and pizzelle cookie grids on the other.  These pieces of equipment can be tricky as the temperature settings are far from precise - mine has "dark" and "light" with a small arrow in the middle and turns almost all the way pas the word on each side!  Always start on the "light" side - and increase the heat if your cookies aren't coming out crispy enough (don't forget - they get crispy after they cool and you can put them back in the hot iron to cook a bit longer so they are crispier).

The right amount of batter & pressure are also important - if you use too much batter, your cookie will separate in the middle when you try to open the cooker.  If you use too little - it'll be very thin and crispy, and perhaps not full size.

SPECIAL TOOLS: 
  • pizzelle iron
  • silicone brush 
  • wood or bamboo tongs 
  • a disposable bamboo chopstick 
 INGREDIENTS:
  • 1.5 c flour
  • .5 c canola oil or melted coconut oil
  • 3/4 c sugar
  • 1 c smooth, unsweetened applesauce
  • 3.5 tsp Ener-G egg replacer
  • 1 tsp baking powder
  • 2 tsp vanilla extract
  • (optional) 1 tsp anise extract or 1 tsp almond extract
  • (optional) dried Meyer lemon zest, crushed
  • Spectrum vegetable shortening (for the pizzelle iron)
INSTRUCTIONS:
  1. Mix the sugar & fat til blended. 
  2. Add the applesauce and other liquid ingredients.
  3. Sift together the dry ingredients and add to the wet ingredients.
  4. Preheat your pizzelle iron!  Once it is hot, make ONE pizzelle - if you find the iron is too hot and make a mess - you'll have less to clean up!
  5. Using a silicone spatula - put a tiny (like 1/8 to 1/4) dab of shortening on the plates - use the silicone brush to move it around as it melts.
  6. Measure your batter - use a 1/4 measure or a spoon so you can determine the right quantity and make it consistent.
  7. Press down lightly - don't overdo it - and let the pizzelle cook.  After a minute or two, gently pry up the cooker to check - if the pizzelle is starting to pull away from the cooker, it's ok to use the chopstick to pry it down a bit. 
  8. When the cookie is lightly browned, remove it to a cooking rack with wooden tongs. The pizzelles will be soft when you take them out and crisp up as they cool!  
  9. Lay flat for cookies, or roll them into tubes for cannoli or cones for ice cream before they cool too much.
For cannoli - check out the Millennium Cookbook - there's an insanely caloric recipe in there for filling.

One last tip - don't overclean your cooker!  It needs to be wiped to remove any excess oil, and use the bamboo chopstick to loosen charred bits.  Scrubbing the plates in soapy water  will just make your cookies stick more next time.

Thursday, June 24, 2010

Cantaloupe Sorbet & Snacks

As if cantaloupe isn't good enough on its own - I had the bright idea to chunk up half a cantaloupe and froze it on a cookie sheet while I made dinner.  Then I put the frozen pieces into the ole reliable Breville blender with a bit of agave to lubricate the works and pureed the heck out of it.  I scraped it into a 9" x 9" light aluminum (no nonstick -yuk!) pan and put it back into the freezer.  Stir every 15-20 minutes or so and you'll have sorbet for 4 as soon as you all finish eating dinner. 

I really had to resist the urge to throw in frozen strawberries, too! 

This morning I sliced up the remaining cantaloupe to throw in the dehydrator - just three weeks til my 4 week motorcycle road trip, so I better get moving on the food prep and meal planning!

Saturday, March 20, 2010

Shaker Lemon Pie

Meyer lemons are going crazy right now - they are everywhere!  Instead of the basic zest & juice for freezer, lemon bars & lemonade, I wanted to try something different.  I read some recipes for Shaker Lemon Pie - standard recipe for a double crust pie is - macerate 2 thinly sliced lemons (no seeds) in 2 cups of sugar for several hours or overnight, put the drained lemons into the pie crust and beat 2 eggs into the sugary syrup - pour on top and bake.

Since the East Bay Vegan Bake Sale was coming up - I wanted to  do something with these gorgeous lemons and put together three versions of the pie.


INGREDIENTS & PROCESS:
  • 2-3 Meyer lemons, depending on size - slice thinly, removing seeds as you go, place into a bowl and cover with
  • 2 cups of granulated sugar
Stir the lemon slices & sugar - keep stirring it every hour or so to ensure the sugar is totally dissolved.  It's ok to leave it overnight - I left it on the counter with a lid on the container. 

  • Strain lemons from sugary syrup and lay out in the pie crust


  • Add 1/3 c of arrowroot and 2 Tb agar flakes to the sugar - beat very well and pour over the lemons in the pie shell.


  • BAKE in preheated oven at 400 for 15 minutes, then reduce to 350 for 35-45 minutes. 
Depending on the agar & arrowroot, you may have a more firm or more loose pie filling - I had one pie come out with a very firm almost jelly like consistency and another that was a loose marmelade consistency.  Both were very good - but one was easier to slice & eat!

  • Deliver to your bake sale!

Saturday, December 26, 2009

Chipotle Soft Caramels

One thing that I have most missed in my vegan diet is caramel - I have always loved caramel and caramel & chocolate is truly an awesome treat. After looking over many many recipes for vegan caramels - many from a Daring Bakers challenge - I realized - it's a lot of guess work. Despite the fact that the top of my candy thermometer (no, not granddad's candy thermometer, mom!) busted off after arriving at the cabin this weekend - it still worked well enough for me to use in my first experiment with vegan caramels.

A major discrepancy was in the amount of invert syrup/agave to sugar, and the temperatures required. The bottom line is this - for soft caramels, you really want somewhere between soft and firm ball - you don't want more because you'll end up with something that will pull out fillings and crowns.

Here's my recipe - your mileage may vary, you should definitely experiment!

2 cups sucanat
1 cup Golden Syrup
1/4 cup maple syrup

Mix together well, and while it is working up to 275 degrees, mix together:

1 cup coconut milk (from a can - shake well!)
1 cup cashew cream (I used Mimic Creme this time)
1 chipotle pepper, toasted and ground in the spice mill
1 vanilla bean (slit the pod, scrape into pan, add pod)

Let the cream mixture warm up - ok if it simmers a bit, just add more coconut or cashew cream.

Keep a brush and water handy - when you stir the sugars, keep in mind, this reduces the temperature so don't stir too often. Use the brush dipped in water to wash down the sides of the pan after you stir. Once it gets to 275, pull it off the burner and add 2 Tb of coconut butter.

Next, add in the cream mixture while stirring - take out the pod piece - and then let it heat up to about 245.

Pour it into a pan lined with parchment paper - moisten with coconut butter if you want to feel safe - and let cool. If it's 40 degrees outside, by all means, set it out on the porch like I did (just pray the racoons and bears aren't around looking for dessert).

This came out super killer yum. Once I dip it in chocolate, I'll try to remember to take some pictures. I promise.

Wednesday, November 04, 2009

Persimmon Paste

A review of my freezer tells me two things - first, I still have frozen persimmon puree from last year.  Second, roasted tomato sauce, persimmon puree and carrot soup all look fairly similar in the freezer and should be labeled appropriately.

After rave reviews of my quince paste (dulce de membrillo) it occurred to me - why not do this with some other fruits? Like, for example, persimmon?

I measured out equal quantities of persimmon & sugar, mixed and heated it.  Concerned that it would not set as well as the dulce de membrillo (remember - quinces have more pectin in them than other fruit), I added some pectin (based on volume) and cinnnamon to the persimmon paste.


Let me tell you - this stuff sticks to the pan at higher temperatures a lot more readily than any jam or quince paste has!  You have to keep the heat low and stir often - once it reduces, then put it into low dishes or cookie sheets lined with canola oil rubbed parchment paper and put into the dehydrator.  The persimmon paste set a lot more quickly than the quince paste (likely the pectin) and according to one friend, "it tastes like Thanksgiving!"

Friday, August 21, 2009

Vegan/Gluten-free & Soy-Free Mexican Chocolate Cake

After reading up on some vegan flourless chocolate cakes and applesauce cakes, I mostly adapted from this recipe on Karina's Kitchen blog, I have to offer you this persimmon chocolate cake which is vegan, gluten-free & soy-free, low fat and made without refined sugar but which tastes so rich and delicious, and is so easy to make that I made three of them.

Ron's Birthday Cake
Put dry ingredients into your mixing bowl or food processor cup:

3/4 c. sorghum flour
1/4 c. amaranth flour
3 tablespoons corn starch
1/2 cup organic sucanat
1 Tb dry Ener-G Egg Replacer
1 tsp baking powder
1 tsp baking soda
1/2 tsp sea salt
1 tsp cinnamon
4 Tb Xocolatl cocoa powder (or regular cocoa powder)

Mix to blend dry ingredients, then addwet ingredients:

1 c persimmon puree
4 oz. melted dark chocolate
2 tablespoons Spectrum Organic Shortening
1/2 c raw agave nectar
2 tsp champagne vinegar
3 tsp vanilla extract
3 tsp coffee extract - or - 1 Tb instant or finely ground coffee
1 tsp almond extract

Blend until smooth, then pour into prepared
springform pan. Bake in pre-heated 350F oven till firm - about 30 to 35 minutes, depending on the size of your pan and altitude. Cool on a wire rack. Chill or eat right away with your fingers and call it a "test," before making another one.

I'll be serving this with a persimmon sauce that I made with 1 c. persimmon, 1 c. water, 1 c. sucanat and cooked down to nearly persimmon butter consistency.

Sunday, December 21, 2008

Persimmon Blondies


IMGP9283
Originally uploaded by jennconspiracy
These tasty treats were easy to whip up and taste great - they blend persimmon, brown sugar, Chinese 5 spice and chocolate chips into a rich, moist blondie that I am looking forward to making again (with pecans!).

This is another recipe test for Hannah's new cookbook so that means no recipe secrets here!

Wednesday, November 26, 2008

Cherry Macaroon Tart


IMGP9134
Originally uploaded by jennconspiracy
The second recipe test for Hannah's new book - turned out awesome - it's super easy to make: a sweetened coconut crust with a filling of sweetened cherries with a bit of almond essence.

Very tasty - I thought the crust would be crispier instead of chewier, but it lasted several days before soaking up the juice from the cherry filling. It was delicious at all stages!

Tuesday, October 21, 2008

Rum Raisin Fudge Brownies

I volunteered to test recipes for Hannah over at Bittersweet Blog - the first recipe came in today and promptly set my spirits in motion. I've been feeling evil and craving chocolate -- this recipe was short and sweet and easy to make. After my rum raisin apple pie experiment, I was happy to give this a whirl.

Rum Raisin Fudge Brownie

I can't share the recipe with you folks - but I plan to remake this recipe and test out a few things on it, so if you are between home and work for me, I might could find my way to share...

I did get a picture up of my Fig Tart and edited the posting to include the result (it was totally eaten up!)