My dear friend Jon loves carpentry projects -- he helped me out with the first step of the solar dehydrator project by taking me to Ashby Lumber to pick up supplies and then he cut up all the pieces a few weeks ago.
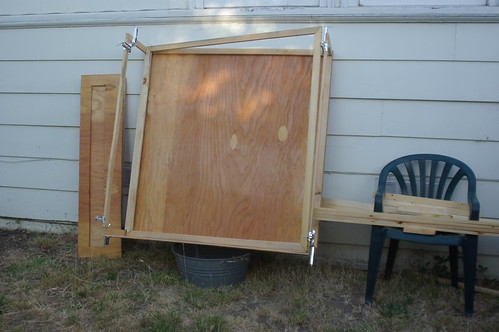
The project should have been easy enough to assemble -- but I was swamped with canning projects. My brother offered to help -- he thought it should be a snap, but Jon and I missed something in the tiny plans that resulted in a "Hey, we have a lot of extra 1" x 2"" and self-congratulatory slaps on the back for efficient chop saw use. My brother pointed out that the plans showed an internal frame -- four pieces on the backside of both vent ends and two pieces lengthwise.
Tonya Kay's sweetie made the construction of this solar dehydrator look easy, but we had some problems figuring out measurements for some of these things because of the difficulty of seeing all the parts on the plan. I also realize that he did a lot of modifications (using window screens and a totally different cover, for example).
My brother and I tried to figure out the correct dimensions of the internal frame - given that the sides are supposed to sit on top of the 48" square back. However, there was a slight miscalculation resulting in Tom cutting the pieces to totally fit flush along the edge of the back.
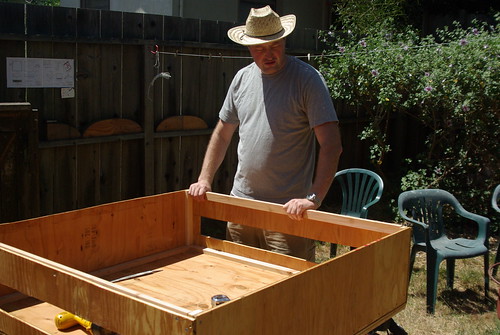
The other problem was that he was gluing as he was screwing -- instead of screwing everything together to make sure it fit, and then taking it apart, applying the glue and rescrewing it together. My brother didn't take this project as seriously as I wished -- he said, "Hey, it's just a box, we'll make it fit."
I tried to explain to him that this was now approaching $200 in materials, was to be used for food and had to have square edges with minimal gaps so that critters would be (mostly) kept away from the food -- to no avail. He accused me of "micro-managing" and wouldn't answer my question, "What is the problem with sticking to the plan if we have one?"
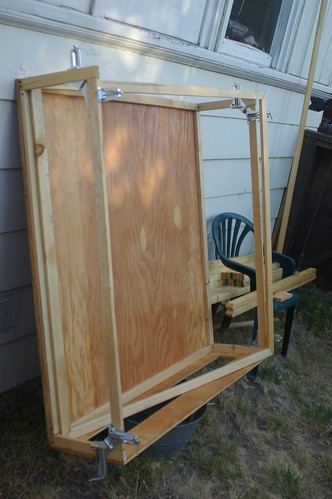
So, while the glue was still wet, I unscrewed the vent sides from the frame, then cut off the pieces that formed the frame. After a discussion with a neighbor who is a contractor, and my friend Jon about how to "make it work" -- a light went off in my head: use the other side!
Today, Jon and I put the dehydrator and shelves together. The biggest trouble we had was correctly figuring out the size of the internal frame. His plan was to put the internal frame together along with the sides -- it doesn't have to be an independently stable frame -- the internal frame just has to provide more stability. And, now that we have additional 1" x 2" along the outside edges on the back side, I think we have plenty of box stability.
I put together the shelves...
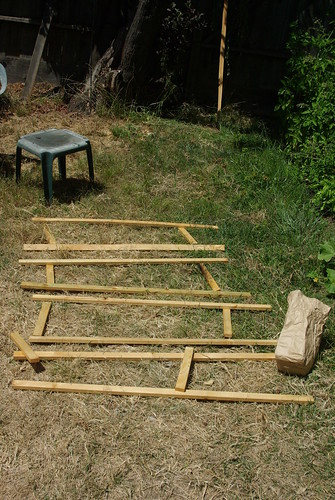
And then we had some beers and watched some movies. The next step is to paint and finish polyurethane.
Book reviews, sewing projects, vegan recipes, and some tech analysis from time to time
Saturday, August 23, 2008
Thursday, August 21, 2008
Domain Added
The domain for this site has now been updated to reflect the title -- http://www.livegreenwearblack.com and http://livegreenwearblack.com/ now point to this blog correctly. Please update your RSS readers accordingly...
True story - the "options" offered by my domain registrar included:
livegreenweardark.com
livegreenwearopaque.com
livegreenwearviolent.com
I kid you not!
True story - the "options" offered by my domain registrar included:
livegreenweardark.com
livegreenwearopaque.com
livegreenwearviolent.com
I kid you not!
Tuesday, August 19, 2008
Save $$$ With Proper Produce Storage
DID YOU EVER WONDER why most modern refrigerators have two vegetable bins? It's not to keep your beer cans separate from your soda cans. I came across an interesting article on ethylene gas and proper food storage on vegan food blogger Kittee's website. I've heard about it before, and it was interesting to note that I already separate my food based on this.
Any amount of folk wisdom plus experience and observation will result in proper food storage, to a certain level, along with a sense of which fruit will ripen once picked and what will simply rot.
Certainly, I have picked up my share of tips at the farmer's market -- a tiny Chinese woman at the Heart of the City farmer's market told me the best way to preserve the giant bags of oranges is to spread them out on a baking sheet, with a towel underneath, so there is plenty of air between them, and eat the softest or ripest oranges first. Works great for other produce, too -- I do this with apples, peaches and apricots in the refrigerator.
Kittee's guide motivated me to do a bit of digging and found a great chart on how ethylene gas affects your produce. I also found a very comprehensive and useful guide to proper food storage on the website of the Canadian Produce Marketing Association.
Without further adieu, here's my guide to what should go into your two produce bins in the fridge, based on which fruits or veggies produce ethylene gas and which fruits or veggies will rot when exposed to too much of it (yes, even in low temperatures in the refrigerator).
Exceptions & Notes:
Don't spend money on silly bags and indicators -- just buy what you need, use what you buy, and keep an eye on how you store things together in the fridge. You know, like companion planting -- this is companion food storage.
BONUS: If you have a big kitchen and lots of storage space with different places that keep stuff at different temperatures, check out this link to the UC Davis Vegetable Research & Information Center Guide to Harvesting & Storing.
FIVE Food Storage Spaces for Optimal (not tiny apartment kitchen) Storage:
Any amount of folk wisdom plus experience and observation will result in proper food storage, to a certain level, along with a sense of which fruit will ripen once picked and what will simply rot.
Certainly, I have picked up my share of tips at the farmer's market -- a tiny Chinese woman at the Heart of the City farmer's market told me the best way to preserve the giant bags of oranges is to spread them out on a baking sheet, with a towel underneath, so there is plenty of air between them, and eat the softest or ripest oranges first. Works great for other produce, too -- I do this with apples, peaches and apricots in the refrigerator.
Kittee's guide motivated me to do a bit of digging and found a great chart on how ethylene gas affects your produce. I also found a very comprehensive and useful guide to proper food storage on the website of the Canadian Produce Marketing Association.
Without further adieu, here's my guide to what should go into your two produce bins in the fridge, based on which fruits or veggies produce ethylene gas and which fruits or veggies will rot when exposed to too much of it (yes, even in low temperatures in the refrigerator).
| Drawer 1: Fruit Drawer (Ethylene producers) Apples Apricots Avocados Bananas Cantaloupe Carambola (star fruit) Green onions Kiwi fruit Leeks Mango Nectarine Papaya Peaches Plums Tomatoes | Drawer 2: Potatoes, Onions, Garlic and Ethylene Sensitive Produce, including: Asparagus (gets tough) Unripe kiwi fruit Watermelon Beans - green & wax (sensitive to cold, causes russeting) Belgian Endive Berries (will get moldy) Broccoli Brussels sprouts Cabbage Carrots (will get bitter) Cauliflower Cherimoya Cucumbers Eggplant Greens, lettuces Peas Peppers Persimmons Quince Squash - winter/dark skinned Sweet potatoes Watermelon |
Exceptions & Notes:
- Potatoes, onions & garlic will sprout when exposed to too much ethylene, but have otherwise low sensitivity to it, hence the traditional co-mingling of potatoes, onions and garlic in the same drawer.
- Some unripe fruit -- like kiwis, bananas, avocados -- are very ethylene sensitive and can be ripened in a paper bag with an apple
- Cherries store with stems to prolong shelf life
- Grapes absorb odors from leeks & green onions, get moldy from Ethylene
- Rhubarb will absorb odors from avocado & green onions
- Peaches, pears, passion fruit & tomatoes produce and are very sensitive to ethylene - store the ripe fruit in a single layer in the refrigerator
Don't spend money on silly bags and indicators -- just buy what you need, use what you buy, and keep an eye on how you store things together in the fridge. You know, like companion planting -- this is companion food storage.
BONUS: If you have a big kitchen and lots of storage space with different places that keep stuff at different temperatures, check out this link to the UC Davis Vegetable Research & Information Center Guide to Harvesting & Storing.
FIVE Food Storage Spaces for Optimal (not tiny apartment kitchen) Storage:
- 2 crisper drawers in your fridge
- 45-55 degree/85-95% relative humidity space
- 50-60 degree cool dark place (basement, garage)
- 65-70 degree room temperature area out of direct light
Monday, August 18, 2008
Traditional vs Green & Effective Treatments for Burns, Cuts & Scrapes
OUCH! What do you do if you have a burn or a cut? Pull out the bandages and the Neosporin or bactromycin?
Well, that's what I used to do. I have had some pretty bad accidents and putting antibiotic ointment on scraps, burns and cuts was the "best" way to protect and heal such injuries.
Thursday, I burned the heck out of my arm on a very hot baking sheet. It's about 3" long and looks ugly -- no blisters, but the whole area around the 3/4" wide burn is very swollen. I put a gauze pad with some antibiotic ointment on it and wrapped it with a bandana (lacking bandage tape). After soaking in hot springs all weekend, I thought I should at least cover it up at work to protect it and realized all my ointment tubes (purchased in 2002 when I had a big skating accident) had expired years ago. So, I tossed them and went to Walgreen's to find bigger bandages and more ointment.
I must say - I was pretty shocked when I read the box and discovered that every single antibiotic ointment is based in petroleum jelly or "petrolatum." Not having many options at Walgreen's, I bought a Walgreen's triple antibiotic ointment tube and some Walgreen's waterproof bandages big enough to cover the burn.
After applying the ointment to the bandage and positioning it over my arm, I noticed some interesting reactions. About 20 minutes after applying the ointment, I felt like there were small hot stones under my hand and side of my arm. The skin didn't feel hot to the touch but something was happening. Less than 3 hours later, I had to yank the bandage because for almost 2 hours, it was killing me -- the adhesive was itching like crazy.
I shudder to think about the process of making adhesive, waterproof bandages -- I really do like the Nexcare bandages, they seem to work pretty well with my skin. I so rarely need to use bandages these days and it begs the questions:
What are the options? Why is petroleum jelly used in a product like this? Is it really safe to use?
ORIGIN & HISTORY OF PETROLEUM JELLY: According to Wikipedia, petroleum jelly was first discovered by workers on the country's first oil rigs as a buildup on the equipment -- but they discovered then it was applied to cuts and burns, it seemed to speed healing. Then, a young chemist patented the process of making petroleum jelly through vacuum distillation and filtration of the still residue through bone char.
Petroleum jelly is hydrophobic -- meaning it repels water -- and it should not be used on fresh burns because it traps the heat inside and can make the burns worse. During WWII, a type of petroleum jelly called "dark red veterinary petroleum jelly" was used in life raft survival kits to prevent sunburn because it nearly perfectly blocks UV rays. Vaseline is often used as a personal lubricant but it can dissolve latex condoms so is not recommended (other oils also break down latex, so you should use water based lubricants anyway).
COMMON USES: Vaseline is a pretty well known household name. Even I have had the same small container of it for 14 years -- I think I bought it while I was in Mexico and used it for protecting my boots. Come to think of it, it'll be the perfect lubrication for my small juice press. Lots of people use Vaseline for dry skin and for makeup removal. Petroleum jelly, or petrolatum, is used in a lot of cosmetics (lip balm, lip gloss, and ointments. The grade used is considered harmless but there are less refined grades which contain carcinogens.
Mineral oil is also made from petroleum and has a lot of effects on the skin and body which are the opposite of what you would expect. A website called "Skin Suicide" describes that mineral oil, as a petroleum product, "cannot be absorbed by the body. It "seals" the skin, clogs pores, attracts dirt and pulls essential trace minerals from the skin. It must be removed with harsh alcohol." Other sources note that cosmetic grade mineral oil is noncomedogenic but YMMV.
IS IT HEALTHY? Information on the safety of this ubiquitous product is hard to find. Even the Environmental Working Group's Cosmetic Safety Database entry for petrolatum is incomplete, though it is listed as a low risk ingredient.
It mentions possible contamination with PAHS but no real details there, either. There have been 876 studies listed in PubMed on petrolatum use -- that's a lot to wade through!
I also found this really lengthy debate about the safety and efficacy of petroleum jelly and mineral oil on a LJ forum.
My takeaways:
My recommendations are:
Next, onto bandages...
Well, that's what I used to do. I have had some pretty bad accidents and putting antibiotic ointment on scraps, burns and cuts was the "best" way to protect and heal such injuries.
Thursday, I burned the heck out of my arm on a very hot baking sheet. It's about 3" long and looks ugly -- no blisters, but the whole area around the 3/4" wide burn is very swollen. I put a gauze pad with some antibiotic ointment on it and wrapped it with a bandana (lacking bandage tape). After soaking in hot springs all weekend, I thought I should at least cover it up at work to protect it and realized all my ointment tubes (purchased in 2002 when I had a big skating accident) had expired years ago. So, I tossed them and went to Walgreen's to find bigger bandages and more ointment.
I must say - I was pretty shocked when I read the box and discovered that every single antibiotic ointment is based in petroleum jelly or "petrolatum." Not having many options at Walgreen's, I bought a Walgreen's triple antibiotic ointment tube and some Walgreen's waterproof bandages big enough to cover the burn.
After applying the ointment to the bandage and positioning it over my arm, I noticed some interesting reactions. About 20 minutes after applying the ointment, I felt like there were small hot stones under my hand and side of my arm. The skin didn't feel hot to the touch but something was happening. Less than 3 hours later, I had to yank the bandage because for almost 2 hours, it was killing me -- the adhesive was itching like crazy.
I shudder to think about the process of making adhesive, waterproof bandages -- I really do like the Nexcare bandages, they seem to work pretty well with my skin. I so rarely need to use bandages these days and it begs the questions:
What are the options? Why is petroleum jelly used in a product like this? Is it really safe to use?
ORIGIN & HISTORY OF PETROLEUM JELLY: According to Wikipedia, petroleum jelly was first discovered by workers on the country's first oil rigs as a buildup on the equipment -- but they discovered then it was applied to cuts and burns, it seemed to speed healing. Then, a young chemist patented the process of making petroleum jelly through vacuum distillation and filtration of the still residue through bone char.
Petroleum jelly is hydrophobic -- meaning it repels water -- and it should not be used on fresh burns because it traps the heat inside and can make the burns worse. During WWII, a type of petroleum jelly called "dark red veterinary petroleum jelly" was used in life raft survival kits to prevent sunburn because it nearly perfectly blocks UV rays. Vaseline is often used as a personal lubricant but it can dissolve latex condoms so is not recommended (other oils also break down latex, so you should use water based lubricants anyway).
COMMON USES: Vaseline is a pretty well known household name. Even I have had the same small container of it for 14 years -- I think I bought it while I was in Mexico and used it for protecting my boots. Come to think of it, it'll be the perfect lubrication for my small juice press. Lots of people use Vaseline for dry skin and for makeup removal. Petroleum jelly, or petrolatum, is used in a lot of cosmetics (lip balm, lip gloss, and ointments. The grade used is considered harmless but there are less refined grades which contain carcinogens.
Mineral oil is also made from petroleum and has a lot of effects on the skin and body which are the opposite of what you would expect. A website called "Skin Suicide" describes that mineral oil, as a petroleum product, "cannot be absorbed by the body. It "seals" the skin, clogs pores, attracts dirt and pulls essential trace minerals from the skin. It must be removed with harsh alcohol." Other sources note that cosmetic grade mineral oil is noncomedogenic but YMMV.
IS IT HEALTHY? Information on the safety of this ubiquitous product is hard to find. Even the Environmental Working Group's Cosmetic Safety Database entry for petrolatum is incomplete, though it is listed as a low risk ingredient.
It mentions possible contamination with PAHS but no real details there, either. There have been 876 studies listed in PubMed on petrolatum use -- that's a lot to wade through!
I also found this really lengthy debate about the safety and efficacy of petroleum jelly and mineral oil on a LJ forum.
My takeaways:
- petrolatum is a petroleum product - there are many reasons to avoid purchasing petrochemicals that are easy to identify
- petrolatum doesn't moisturize - it acts as a barrier to moisture and actually can dry out your skin
- petrolatum doesn't heal -- it can protect (ie, preventing blisters in humid/hot environments) but it is a barrier, not a healing agent
My recommendations are:
- tea tree oil (a natural anti microbial/fungal)
- lavender oil is supposed to work great on burns to relieve the sting (not so sure about broken skin)
- honey is always good on burns - it's a natural antibiotic
- herbal or homeopathic burn care ointments such as Quantum Derma First Aid or Weleda Burn care Ointment might be safer, healthier alternatives
Next, onto bandages...
Friday, August 15, 2008
James' Chai Recipe
My sweetie makes the best chai -- he did a lot of research and experimentation into what makes the most traditional, balanced chai. He's had to modify since I'm dairy-intolerant and can't handle a lot of caffeine in tea.
I've learned to make his recipe over the last year or so, but I now do some modifications of my own like adding more ginger or some star anise. Here's the basic recipe and instructions.
James' Chai
I've learned to make his recipe over the last year or so, but I now do some modifications of my own like adding more ginger or some star anise. Here's the basic recipe and instructions.
James' Chai
- 1 carton Pacific almond milk (vanilla if you want it sweet)
- 8 cardamom pods
- 1 thumb size piece of cinnamon -- about 1/2" of a stick - not a lot though maybe more if you use Ceylon (soft sticks) than if you have Cassia (hard sticks).
- 4 white peppercorns
- 4 cloves
- 4 thin slices of fresh ginger
- scant 3 Tb of loose Assam tea -Recommended: Brooke Bond Red Label Tea or Taj Mahal Tea (available at Indian markets). Large leaf teas do not work as well, but usable in a pinch, as are tea bags, though not recommended.
- Pour almond milk into pot.
- Turn heat on full.
- Crush spices in mortar/pestle or on cutting board with knife handle (careful not to send peppercorns and cloves flying across the room).
- Add crushed spices, tea and ginger to almond milk.
- Bring just to steam -- you don't want it to go past "just starting to simmer" because the almond milk will separate.
- Turn off heat and put on lid, allow to steep 15 minutes.
- Heat on medium to steaming, then remove from heat and serve. Pour through fine metal mesh tea strainer or into a teapot with a fine metal mesh insert.
- Enjoy!
Peach Chipotle Jelly
YELLOW PEACH CHIPOTLE JELLY: After steeping overnight, this tasted good - smoky with a bit of a kick which will go down a few notches when I add the sugar and lemon. I strained it with a metal mesh strainer and the put it through the jelly bag. I was so enchanted with the color and body of the white peach jelly that I wanted to try it again!
Next time - more chipotle peppers.
RECIPE:
9 - 8 oz jars
Next time - more chipotle peppers.
RECIPE:
- Strain juice from cooked peaches and measure. I ended up with 6 c. juice.
- Strain juice through jelly bag -- add 1 c. water and simmer with 2-4 chipotle peppers. Let steep and stand overnight if you have the time, otherwise, add more water and simmer away longer.
- Measure - add more water to get back to 6 cups (remember - you're boiling away water, you don't necessarily want to concentrate the peachiness and decrease your yield).
- Add 1/2 c. lemon juice, and follow instructions for your pectin. I used Pomona's Pectin, so added 6 tsp of "calcium water" and put 6 tsp of pectin powder into 2.5 c. of sugar.
- Bring to a boil, then add the sugar-pectin mix, stir and make sure it dissolves and doesn't stick to the bottom of the pan.
- Return to a simmer.
- Skim foam.
- Put a test -- a teaspoon of jelly on a plate -- in the freezer for a few minutes. If it looks and feels like jelly in your mouth, you're probably all set. If not, let another test set longer, then consider adding a bit more pectin (mixed with sugar if you're using Pomona's).
- Put into sterile, hot jars from the oven and set on the counter, or hot water process.
- Label these jars - you don't want someone who hates spicy to get a surprise!
9 - 8 oz jars
Step up & Speak!
Time to speak out against the proposed changes to the Endangered Species Act. Submit your opposing comments to the changes documented in FWS-R9-ES-2008-0093. They are not accepting e-mail or faxes -- but they do have an online form for accepting comments. You can make it short and sweet.
To recap, the proposed changes "eliminate the requirement for independent scientific reviews of any project that could harm an endangered species living on federal land. Instead, federal agencies would decide on their own whether the projects — including construction of highways and dams — pose a threat and then move ahead if they determine there is no problem. [...] The new regulations would overturn one of the act’s most fundamental provisions. Under current rules, federal agencies are required to submit their plans to either the Fish and Wildlife Service or the National Marine Fisheries Service." (Source: New York Times, 8/13/2008).
Thursday, August 14, 2008
Peach Jam
YELLOW PEACH JAM: Ah, here we are at midnight again... I cut up 2 gallons of peaches and have made peach jam. This time, I did take the skins off, so had a pot of water boiling in front of the bigger pot for the peaches, and the peaches on a big commercial baking sheet on the edge of the sink with the cutting board and cutting bowl in the middle. For 2 hours, I listened to the Olympics and had 5-6 peaches in the hot water, skinned, pitted and mashed or chopped the others. I put the hot peaches under cold water and on the side of the tray nearest me.
Then, I let the whole pot simmer while I pressed a bag full of lemons from Regan's tree -- I got 3 cups of juice which I need for jelly and for spanakopita (among other things!). I strained the fruit and divided it -- 8 cups in each pot, reserving 8 cups of juice. I ended up putting about 1.5 c of juice back into the fruit after adding the pectin, lemon and sugar.
Before going to bed, simmered the juice I strained from the pulp with some dried chipotle peppers and am going to let it steep overnight for a smoky peach chipotle jelly. No pictures, and I hope to make it to the 5:45 swim tomorrow... I'll never make it to the Olympics, unless it is the preserving Olympics!
YIELD:
14 - 12 oz
1 - 4 oz
Moroccan Preserved Lemons
LEMONS ABOUND IN CALIFORNIA. It seems like everyone has a lemon tree - except me. Fortunately, none of those folks know what to do with all their lemons and they are more than happy to have some help clearing lemons off the tree so they don't have to pick up moldy lemons from the ground.
I like to juice up a big pile of lemons and freeze the juice in ice cube trays. I also save the zest and freeze it -- it's very usable for other recipes this way. Of course, there's the lemon chutney, lemon bars, and preserved Moroccan lemons.
When I first researched this, I found a lot of recipes out there -- the process is fairly straight forward and simple, varying only in quantities and spices.
For spices, pick your spices based on what you have at hand and when it comes to dried spices, make sure that what you have that isn't a million years old (throw out the old stuff in the compost heap). I used cinnamon, black pepper, cloves, coriander seed and bay. Check the different recipes for quantities and add to taste. Experiment with different levels of spices in different jars -- it's up to you!
PROCESS:
Screw on the lids and put aside for a few weeks. These should be ready in 4-6 weeks.
Remember:
I like to juice up a big pile of lemons and freeze the juice in ice cube trays. I also save the zest and freeze it -- it's very usable for other recipes this way. Of course, there's the lemon chutney, lemon bars, and preserved Moroccan lemons.
When I first researched this, I found a lot of recipes out there -- the process is fairly straight forward and simple, varying only in quantities and spices.
For spices, pick your spices based on what you have at hand and when it comes to dried spices, make sure that what you have that isn't a million years old (throw out the old stuff in the compost heap). I used cinnamon, black pepper, cloves, coriander seed and bay. Check the different recipes for quantities and add to taste. Experiment with different levels of spices in different jars -- it's up to you!
PROCESS:
- Sterilize your mason jars. Put some of the spices in the bottom of the clean jars, along with a couple tablespoons of salt. Save the cinnamon sticks and some of the other spices to add between the layers.
- Scrub your lemons very well. Trim any bad spots & trim off the stem end.
- Cut your lemon lengthwise almost to the end, then turn it over and cut from the other direction so it is quartered but still attached at both ends.
- Stuff as much kosher or sea salt into your lemon, then smash it into a sterilized mason jar using a wooden pestle -- press it down into the jar to get it to release more lemon.
- Add another layer of salt, a sprinkle of dried spices, and another salt-stuffed lemon.
- Once the jar has enough lemons, press them down and release more juice. Pour more freshly squeezed lemon juice on top to cover. Slide in the bay and the cinnamon along the side of the jar, and get the bubbles out with a butter knife or thin spatula.
Screw on the lids and put aside for a few weeks. These should be ready in 4-6 weeks.
Remember:
- Pull lemons out using a clean utensil, not your fingers or any utensil that has been used on something else.
- Add more lemon juice and lemons as you go along -- if you squeeze a lemon, throw the squeezed (squoze?) half into the jar and push down. The brine and juice will do their thing and you can keep a jar going for a while.
- Paula Wolfert's recipe on Epicurious
- Kitty Morse's recipe on Seasonal Chef
- Preserved Lemons on Simply Recipes
- Heidi Swanson's implementation of Chez Panisse Fruits recipe on 101 Cookbooks
Wednesday, August 13, 2008
Time to Make the Doughnuts!
DOUGHNUTS: The other day, I came across my doughnut cutter when I was looking for a heart shaped cookie cutter for the pastry on top of my apple pies. I thought - gee, it's time to make doughnuts!
Then, a coworker made and brought in a pile of doughnuts -- not vegan. So, I did a search for some doughnuts, and found that People's Donuts makes and sells locally (but, ew - stale! I mean - once a doughnut has cooled down, it's done!).
In the last two days, I have come across several recent postings about doughnuts:
The universe is telling me that the time is here. I'm going to have to make some doughnuts -- maybe apple cinnamon doughnuts with my grandmother's (veganized) recipe.
Then, a coworker made and brought in a pile of doughnuts -- not vegan. So, I did a search for some doughnuts, and found that People's Donuts makes and sells locally (but, ew - stale! I mean - once a doughnut has cooled down, it's done!).
In the last two days, I have come across several recent postings about doughnuts:
- A review of VooDoo Donuts in Portland on To Live and Eat in LA and on Vegan Shizzle and on VeganFabulous
- A doughnut "Photo of the week" and recipe link on Vegan Tree House to the Urban Housewife's 2007 doughnut recipe
- A delicious entry on the scientific approach to vegan doughnuts, or Aromatic Rings on
Parsnip Parsimony - A review of Mighty O organic donut shop in Seattle on Emo Potato
- A mention of Ronald's Donuts in Vegilicious
- A recipe in Two Little Vegans
The universe is telling me that the time is here. I'm going to have to make some doughnuts -- maybe apple cinnamon doughnuts with my grandmother's (veganized) recipe.
Subscribe to:
Posts (Atom)


