Showing posts with label casserole. Show all posts

Tuesday, March 08, 2011

Cheesy Broccoli Rice Casserole

A conversation with my mom yesterday gave me a brilliant idea that pulled together the Daiya cheese I picked up to try for the first time a couple weeks ago and the giant bag of broccoli crowns from last week's Mariquita Mystery Box.  This is a recipe in development as I didn't exactly measure everything and it worked out perfectly!

Before throwing this together, I looked up some recipes for Broccoli Rice casserole - most of them use the same basic ingredients: broccoli, rice, cheddar cheese, a can of UBI (universal binding ingredient aka Campbell's Cream of Mushroom Soup).   Being the snob that my brother accuses me - I don't have any Campbell's (or any other packaged soup) in the house.  I do, however, have a variety of dried wild mushrooms and Road's End Organics Savory Herb Gravy packets.  As always - save the water that you use to soak the dried mushrooms - don't worry if they still feel firm - they will soften up after they are mixed in and baked.

INGREDIENTS:
  • 4-5 cups cooked rice - I used brown basmati & Louisiana wild rice cooked w/veggie stock
  • 1 qt stock/mushroom water
  • EVOO or untoasted sesame oil, as needed
  • 1.5 c white wine
  • 1/2 c nutritional yeast
  • 8 oz package Daiya cheddar shreds
  • 3 to 4 c raw broccoli crowns cut up into tiny florets, thinly slice the stalks
  • 1 red onion, quartered & thinly sliced
  • 3 cloves garlic, thinly sliced & roughly chopped
  • 1/2 red bell pepper in 1/2" dice
  • 2.5 cups mushrooms, fresh or dried
  • 1 Tb dried thyme
  • salt, pepper, red pepper flakes to taste
  • 2 packets Road's End Organics Savory Herb Gravy (you could possibly substitute this by making a little almond butter gravy or mixing up flour/tapioca starch/corn starch to gravy-fy the mushrooms & onions)
PROCESS:

I used my two largest cast iron skillets (10" and 11 3/4"), a large stainless still mixing bowl for combining everything and a big Pyrex casserole dish.
  1. Using the smaller skillet, heat a few tablespoons of oil and add the onions, cook until transluscent.  Add the garlic.
  2. While the onions & garlic cook, use scissors or a knife to cut up the dried mushrooms into small dice.  You can leave fresh mushrooms in larger pieces but I think dried mushrooms turn out better if you cut them smaller.  I used scissors to cut up dried porcini pieces into little bits, and a knife to cut up the dried shitakes (which come whole).
  3. After the garlic starts to soften and liquid in the pan is reduced, add the mushrooms.  Cook until reduced and then deglaze with a generous amount of wine.  Continue cooking until the wine reduces then add more until you have added all the wine.  
  4. Remove mushrooms & onions from heat, stir in thyme, nutritional yeast & contents of gravy packets, stir until well mixed. 
  5. Put the larger skillet on high heat with enough olive oil to coat - add broccoli stalk pieces first, stir fry til bright green, add florets and red pepper flakes.  Squeeze in juice of 1/2 lemon if desired.
  6. Once florets are bright green, start adding the quart of stock - about 1/4 of the quantity at a time to simmer/steam the broccoli a bit.  Even better if you are using the mushroom soaking water!
  7. After using 1 qt of stock and reducing to about 1/2 c liquid, turn off flame.
  8. Transfer rice to large stainless steel mixing bowl and break up any lumps.  
  9. Transfer broccoli to mixing bowl and toss with rice.
  10. Add  Daiya cheddar shreds and toss with broccoli & rice.
  11. Spoon in raw diced red bell pepper along with the mushrooms & onion mixture and toss gently.
  12. Taste and season with salt, black or white pepper, or Nama Shoyu as needed.  A little vegan worcestershire or peanut sauce might not hurt either.
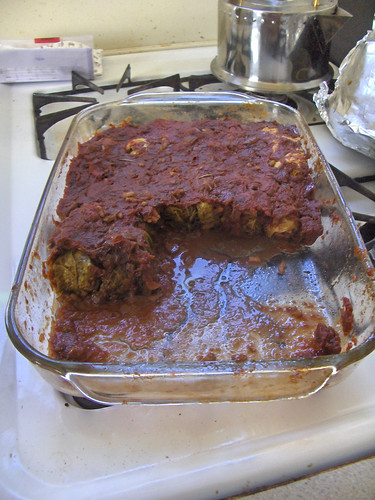
  13. Transfer to your lightly oiled Pyrex casserole dish, bake at 450 for 30-40 minutes.
  14. Remove from the oven and let cool before you eat it and burn your fool mouth!

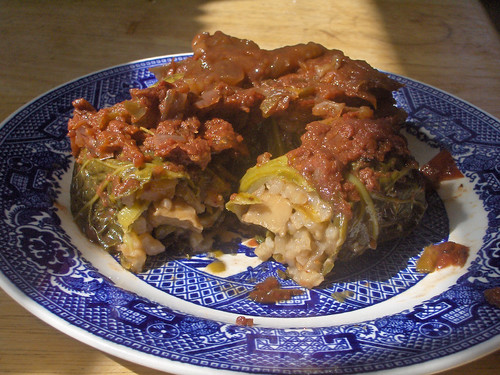
It tastes even better the next day and slices into servings wonderfully!  The Daiya cheddar shreds tasted really good out of the package and melted really well.  The edge along the casserole dish got crispy chewy cheesy, making me wish I had saved some of the shreds to put on top to make it more bubbly & cheesy.

Tonight, I'm going to make garlic cheese bread with the Daiya mozzarella shreds that are in the fridge.

Wednesday, June 23, 2010

The Last of the Enchiladas Verdes!

I love summer but honestly, I am so very much looking forward to fall when I can get more chiles and tomatoes.  I've now just used up the last of my green enchilada sauce on a casserole dish of enchiladas stuffed with summer veggies.

The beauty of having a stock of homemade red and green enchilada sauce in jars is that I can make up the enchiladas with whatever I have at hand - I have used tofu, seitan, potatoes, any number of veggies, nut cheeses - you name it. I end up making enchiladas with the same stuffing maybe twice - and then move on. Here are instructions for tonight's dinner of:


Summer Veggie Stuffed Green Enchiladas

Ingredients:
1/2 med-large red onion, 1/4" dice
1-2 summer squash, 1/4" dice (you need about one generous cup of diced squash)
3-5 orange & white Chantenay carrots, 1/4" dice
3/4 cup corn kernels (froz or fresh)
4 cloves of garlic, pressed or finely minced
1 serrano chile, stemmed & seeded, finely minced
1/2 cup nutritional yeast
1 Tb cumin seed
1/2 tsp whole white pepper
extra virgin olive oil, as needed
2 pint jars of green enchilada sauce
1 c toasted pumpkin seeds
1 package corn tortillas (12 ct)

Directions:
  1. Heat up a large cast iron skillet with 2 Tb or so drizzled olive oil.
  2. Sautee the carrots until they start to get browned and soften.  
  3. Add chile, onions & garlic and sautee til soft. Stir to prevent sticking.
  4. Add squash & corn.
  5. In a separate dry pan, toast the cumin seed and white pepper - grind in a spice grinder and add to the cooking veggies.
  6. In the dry pan, spread the pumpkin seeds and toast - medium flame, move them to keep them from burning but not so much as to dissipate heat.  They should pop like popcorn.  Once they are toasted, remove from heat in a cool dish (they will continue to cook and scorch in the hot pan).
  7. Spread 1/2 c of enchilada sauce in the bottom of a 7" x 11" glass baking dish.  Put one tortilla in the pan, spoon some filling onto it.  Make sure it goes all the way out to the edge and roll it up.  Push it to the end of the pan.  The sauce on the outside of the tortilla helps soften it up and helps distribute the sauce a bit between the stuffed tortillas.  
  8. Fill the rest of the tortillas - just squish them in together - if you run out of space and have extra tortillas, usually I'll have 1 or 2 extra - shred the tortilla into bits, ladle more sauce on the enchiladas, and then place the tortilla bits in areas that have space or where tortillas may have split when you rolled them up. 
  9. Pour on the rest on the rest of the enchilada sauce, encouraging it to go down the sides into the ends of the stuffed tortillas with a spatula or spoon.
  10. Bake in preheated 350 oven for 20-30 minutes until tortillas are softened. Sprinkle generously with salted toasted pumpkin seeds and serve.

Tuesday, March 09, 2010

Savoy Cabbage Rolls Stuffed with Chanterelles, Spring Alliums & Arborio Rice


Mariquita's Mystery Box included a gorgeous head of Savoy cabbage - and after contemplating several ideas, including kim chi - I remembered my grandmother's cabbage rolls, read a few recipes and decided to approximate my grandmother's version using her recipe of Pottsville Relish which I have made up every year since college (so I always have some on hand til early summer, at least!).

Her cabbage rolls were stuffed with rice, onions and some ground beef, swimming in a sweet & sour tomatoey sauce.  It was always the sauce and the cabbage part that I liked best - the tomato not too thick, not too sweet and still savory.  Most of the recipes I read either called for using cooked rice or  uncooked rice (and rolling looser rolls).

Since I'm a big fan of risotto, I liked the idea of letting the water from the tomato sauce finish the rice, so this recipe calls for partially cooking the rice. If you happen to have cooked rice on hand - by all means, use it (waste not, want not!).  I'm a big fan of reserving extra rice from Thai or Indian take out for use in dinners the following day.  :)

This recipe has two parts, the filling and the sauce.  I have included alternate instructions for ingredients that you may not have on hand. 

STEP 1: Cabbage

In a large pot,place sufficient water and a steamer basket, bring to boil and put your washed head of cabbage inside.  If the lid won't fit, improvise with a stainless steel mixing bowl.  Let the whole head of cabbage steam on a med-hi simmer while you prepare the filling.  I turned my cabbage over once, let the water nearly boil down and left it on the stove with the lid on until the very end.


STEP 2Filling

Pull out your two largest cast iron skillets - I used #8 and #10.  In the smaller pan, drizzle enough olive oil to cover the bottom and heat on medium-high. Add

  • 1 cup arborio rice
Stir gently and coat the rice with the olive oil until it starts to become transluscent, then add:
  • 1 cup mushroom stock
  • 1 tsp salt
  • 2 Tb dried thyme
  • Black pepper to taste
  • 1/2 tsp smoked paprika
Turn heat to a simmer - this smaller pan will be your filling pan and you will add a few more batches of ingredients to it.  You want the broth to absorb into the rice but you don't want it to stick.   If you have an open bottle of cooking wine, add 1/4 - 1/3 c to the rice while it simmers.

In your other, larger skillet, heat the pan with a drizzle of olive oil, add:
  • 1 qt cleaned & coarsely chopped chanterelle mushrooms (about 1.5# - substitute for portobellas or shitake) 
For chanterelles, you want to put a lid on the pan and heat these until they throw off some liquid - drain that into the rice and return the pan to heat.  The mushrooms will put out a bit more liquid - then you can just add them to the rice & broth.  For other mushrooms, heat until softened and add to the rice & broth.


Next, add a bit more olive oil to the emptied skillet and reheat it, add:
  • 4-6 spring garlic (white & green part), cleaned & chopped (or 3-4 cloves garlic, minced)
  • 1 healthy spring red onion (whole thing!), cleaned & chopped (or 3/4 to 1 c. finely chopped red onion)
Sautee the onion & spring garlic til soft, add:
  • 2-3 coarsely shredded or julienned/chopped spring carrots (about 1/2 - 3/4 c carrot)
Once carrots start to soften, add all vegetables to the rice & chanterelles in the other pan and mix together.   Reduce the temperature.  You want the broth to absorb into the rice, but you don't want it to stick.  Test the rice - it should be undercooked by at least 50% when you shut off the flame to let it cool.

NOTE: Taste your filling!  Does it taste good?  Do you just want to sit down with a bowl of it or reserve i as a side dish?  Check your spices, adjust if necessary.


STEP 3: Sauce

After you have emptied the larger skillet of garlic, onion & carrot - return the pan to the flame and deglaze with:
  • 1 c red wine (whatever you have open!) or mushroom stock
  • 1 Tb crushed dried rosemary
  • (optional) 1 Tb crushed dried oregano, marjoram or tarragon
  • 1 Tsp cayenne pepper flakes
Reduce the heat and let simmer to reduce for about 10 minutes, then add:
  • 1 pint San Marzano Tomato Sauce or other unseasoned tomato sauce (open a quart jar of store bought sauce don't use the whole thing all at once!)
  • 1 pint Pottsville Relish  (alt - 16 oz can chopped tomatoes & peppers plus 1/4 c vinegar & 1/4 sucanat)
  • 1/2 c light vinegar (champagne, white wine or apple cider)
  • 1/2 c sucanat (or 50/50 granulated & brown sugar)
  • salt & pepper to taste
  • herbs to taste - finely chopped fresh parsley or oregano
  • (optional) 2 Tb smoked red jalapenos packed in olive oil or chili oil to taste, or toast & grind a piece of chipotle pepper to add some smoky heat
Cook down the sauce, taste it, adjust seasonings & spices as necessary.  We're going for sweet & sour but still savory - not too sweet! not too sour!  Turn heat down to med-low and simmer.

At this point, your cabbage should be cooling off and your filling should be cooling off, too.  I let my sauce simmer for about 30-45 minutes, your time may vary based on the amount of water in your tomato sauce (my tomato sauce was very watery!).

STEP 4: Assemble

Prep cabbage by pulling the leaves off.  Using scissors, cut off the thickest part of the spine with a V-cut.  Make a nice big stack of leaves on your cutting board or plate.

Your filling should be cool enough to handle - take some and form a small ball - maybe 1/4 cup.  Place it in a cabbage leaf - fold up the cut ends across each other, then the sides, then firmly roll and place into the pan with the loose side on the bottom.

Repeat until you fill your pan.

Cover the rolls with the sauce from your skillet.  If it seems a bit thick - add a bit more sauce from your reserve or from the extra half pint - smooth with the back of a spoon.

Cover the casserole with foil or a lid and bake at 375 for about an hour -- you want it to be nice and bubbly, with sauce thickening up on top, water from the sauce working down into the rolls to finish cooking the rice inside the rolls.

Leftovers Rule!

YIELD:  10 x 16 baking dish of 16-20 rolls, depending on your cabbage and how you roll'em!  You could also put some rolls and sauce into glass or metal baking dishes to freeze and heat up later (yum!) - if you have that kind of space in your freezer!


Postscript: many of the ingredients came from my own yard (herbs mostly) or from Mariquita (carrots, spring garlic, red onion, savoy cabbage, San Marzanos for tomato sauce, red jalapenos that I smoked and preserved, sweet peppers & tomatoes in the Pottsville Relish, even the cayenne peppers that I dehydrated and made into flakes!). 

    Saturday, December 26, 2009

    Enchilada Casserole Deluxe

    MAKING ENCHILADA SAUCE was probably one of the best things I did this year. I have been eating up the enchilada sauce at a much quicker rate than the marinara sauce, truth be told. This weekend, I am off in the Sierras at the cabin of friends of a friend - and the two of us are relaxing, skiing and cooking up a storm (well, at least I am). I helped my friend Eric at his cooking class at Millennium last weekend - and being that I hate to see anything go to waste, I ended up bringing home a pint of fantastic hominy, a pint of shredded parboiled brussels sprouts and a pint of pepper puree (not too spicy). I didn't quite know what I'd do with it til I realized I was feeling too lazy to make pappardelle for chanterelle stroganoff after a post-skiing first time session making chipotle caramels (which came out awesome, btw).

    One of my favorite dishes is chilaquiles - which is basically diced tomatoes, with onions, garlic & green bell peppers, maybe a minced jalapeno - all simmered, made into a casserole with fried up strips of stale tortillas, covered with crema fresca and cheese. I've heard chilaquiles referred to as an "artery clogger" or "heart attack on a plate." In San Francisco, they are usually made with scrambled eggs... making a heart attack more eminent.

    Being that I was feeling completely lazy after the skiing/caramels activities - I decided first to make enchiladas, and then decided to layer it - like lasagna. The result was essentially a roasted peppers based chilaquiles casserole - without the dietary cholesterol associated with the traditional recipe:

    Step 1:
    2 cups large white hominy
    1/2 cup chile paste (dried chiles soaked in hot water & pureed)
    1 cup water

    Simmer hominy, chile paste & water til substantially reduced.

    Step 2:
    3 Tb olive oil
    1/2 minced onion
    2 cups shredded parboiled brussels sprouts (or some other green veggie - kale or mustard greens would work)

    Sautee onions & brussels sprouts til onions are soft. Once hominy/chile mixture has cooked down, add to the pan. Add:

    1/4 cup nutritional yeast
    3 Tb cumin
    salt & pepper to taste
    16 oz silken tofu (mash into pan or puree in blender first)
    2-3 Tb tomato paste (optional)
    1/3 c finely chopped cilantro (optional)

    Cook this down til it reduces substantially.

    Meanwhile - warm up your tortillas - you want to dry out a package of about 12 tortillas just a bit. Drizzle the bottom of the casserole dish with olive oil and then cover the bottom one layer of corn tortillas. You'll put down the filling and cover with the rest of the tortillas before putting the enchilada sauce on top.

    Warm up 1 pint of Red Enchilada sauce - add about 1 Tb of powdered toasted chipotle pepper. Once the filling has reduced - spread it into the casserole pan, cover with a layer of tortillas, then spread all the enchilada sauce on top.

    Bake for 30-40 minutes. Remove - spread the enchilada sauce smooth across the top with the back of a spoon or spatula, pour on 1 cup of cashew cream (or unsweetened Mimic Cream), sprinkle with toasted pumpkin seeds & crushed tortilla chips, Let sit for a few minutes to cool (it makes serving easier!) - use a nice sharp metal spatula to heft out a chunk of delicious casserole to your plate and enjoy!

    Thursday, October 29, 2009

    Green Enchiladas

    The first time I made green enchilada sauce, it was with a recipe from "The Vegetarian Table: Mexico" by Victoria Wise.  I always found that it didn't make quite enough sauce for my tastes and frequently used more tomatillos than she recommended.  After a recent review of recipes for green enchilada sauce across the internet, I have come to the conclusion that the recipe is fairly basic and should bear the personal touch of the person preparing it.

    I defrosted the roasted green Anaheim chiles from a few weeks ago - that yielded about 5 c of roasted, peeled peppers.  After shelling out some bucks for tomatillos and onions at Rainbow Grocery, I was ready to go!  You can modify the amount of ingredients to taste, and remember - it's easier to add than to take away ingredients.

    Green Enchilada Sauce
    • 5 cups roasted & peeled green Anaheim or Poblano chiles 
    • 2 cups vegetable broth
    • 3 small-med white or yellow onions (mine were just smaller than tennis ball size), peeled and quartered
    • 1 - 2 lbs husked tomatillos, halved or quartered
    • 5-6 cloves of garlic, peeled
    • 1 c raw pumpkin seeds
    • 1 pint yellow cherry tomatoes
    • 1 bunch of cilantro, stems trimmed off
    • fresh parsley, stems trimmed off
    • fresh leafy greens - Romaine, white mustard, arugula (careful with strong flavors like spinach)
    • sea salt
    • 1 Tb coriander seed
    • 1 Tb cumin seed


    Instructions:

    1. Pour 2 cups vegetable broth into a sauce pot, add garlic, onions & tomatillos, add water to cover and bring to a boil.  Let simmer til onions are transluscent and tomatillos are soft.
    2. Heat up a dry cast iron skillet, spread the pumpkin seeds in a single layer and heat til they start to pop.  Turn down the heat if necessary to prevent burning.  Use a wooden spoon to keep the seeds moving as needed and pop/toast as many as you can.  Put into a separate dish.
    3. Put cumin and coriander seed into the hot pan - warm and slightly toast but don't burn - then put spices into coffee or spice grinder and pulverize, set aside.
    4. Check your veggies - add half of the cleaned cilantro to the water to soften, and turn down the heat if your veggies are soft.
    5. Mix in the roasted peppers with the veggies in the pot.  
    6. Reserve 1/8 c toasted pumpkin seeds and put rest of toasted pumpkin seeds into food processor or blender, add water from veggies to get it moving when necessary, until all seeds are ground.
    7. Continue adding veggies & cooking broth til all is processed and smooth. Add yellow cherry tomatoes and leafy greens -- I used white mustard because it was in my garden, you might try romaine (it's got Vitamin C!).  
    8. Add about half of the ground cumin & coriander.
    9. Taste - adjust cumin, coriander, salt and cilantro as needed.
    10. Return to pot and heat on medium, stirring.  Cook down if necessary, or add more water/broth if necessary.  Taste and adjust as needed. 
    11. Make a batch of enchiladas and freeze or can the rest of your sauce!
    YIELD:
    • 1 medium size pan of enchiladas
    • 4 - 16 oz jars

    Green Enchiladas
    Enchiladas are one of my favorite things to make because they are so easy and you can put whatever you want into them.

    Ingredients:
    • 1 package corn tortillas
    • 1/2 yellow onion, minced
    • 1/2 package Westsoy seasoned seitan strips, julienned
    • 1 c yellow cherry tomatoes
    • 2 cloves garlic, coarsely chopped
    • 1/2 c chopped cilantro leaves
    Instructions:
    1. Sautee onions and garlic with oil or broth til translucent.
    2. Add cherry tomatoes and cook til they start to split.
    3. Add seitan and cilantro.
    4. Stir and add broth or water to deglaze when it starts to stick to the pan.
    5. Warm up the tortillas in the microwave for 20 seconds, or steam them - you want them to be soft but not cooked so that they don't crack when you roll them up.
    6. Lay tortillas in the sauce - get both sides wet with the sauce, then lay the tortilla over your casserole dish. Put down a line of fillings along edge and roll up the tortilla, put it in the casserole pan.  
    7. Once your pan is full of tortillas drenched in sauce and filled with seitan, cover with a little more enchilada sauce and bake for 15-20 minutes while you set the table or make your guacamole.
    8. Sprinkle with toasted pumpkin seeds and serve!